Manage Image Definitions Tool

Getting Started  Previous  Next

Manage Image Definitions Tool is used to create/edit/delete Image Definition Objects.


mouse_20 Using the Manage Image Definitions  Tool:

Find the Manage Image Definitions Tool icon ssManageImages on the Library Toolbar (color coded peach) and Click on the tool. The manage definitions dialog will show up and for the editing of image definitions. After performing the desired operation in the manage dialog, click OK to save it to the drawing. If cancel is clicked, all the changes performed since opening this manage dialog are undone.


Manage_Images


mouse_20 Select Image Definition:

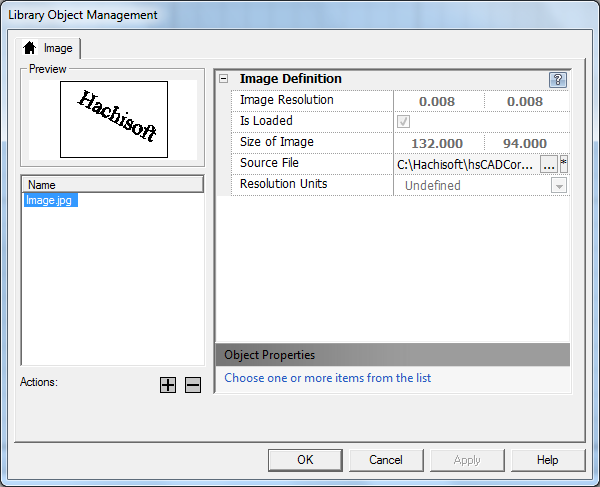
To select an image definition, click on one of the image definition names from the list displayed on the left hand side of the manage dialog.


mouse_20 View/Edit Image Definitions:

To view properties of a image definition, select an image definition form the left panel. The "Preview" section will show the selected image definition as it will appear in drawing. All properties for the selected image definition are displayed on the right hand side of the manage dialog.


btnAdd Add Image Definitions:

To add new image definitions to drawing's library, click on the add button (btnAdd) in the "Actions" section. This opens a standard dialog to choose image files. After selecting the desired file, click "OK" and a new image definition is added to drawing's image definition library. By default the name property of the image definition object is set to name of the source file.


btnDelete Delete Image Definitions:

To delete an image definition from the drawing's library, select an image definition from the left. Click on the delete button (btnDelete) in the "Actions" section. The selected image definition will be deleted. The delete button (btnDelete) becomes unavailable when there is no image definition selected.


Also See:

Image Definition Objects

Library Toolbar